The New Kiln, First Glaze Firing and Meeting Deadlines

 
IMG_7807.JPG

There’s no better word to capture what firing a gas kiln for the first time is like other than, terrifying. Add to that a mix of excitement, mystery, anxiety and anticipation and you’ve got the makings of an emotionally charged thirty hours. There’s a lot at stake considering the number of pieces it takes to fill a kiln, the hours required to make them, the cost of clay, glazes and fuel and the potential for sales that can result.  If firing a kiln for the first time produces even a few good pots, it can be classified as a success because there are many bugs that have to be worked out, adjustments that have to be made and learning the unique quirks of the kiln that only future firings can reveal. Every potter has the obligatory “seconds shelf” that likely includes a number of first kiln firing pots.

I knew the first firing of my soon to be built kiln would yield more than a few failures. That’s why, when I was contacted by two folks from my community who heard I was getting back to making pottery and wondered if I would do a few pieces for them and I said I would, my level of anxiety climbed even higher. One wanted some bowls and mugs for her daughter’s 40th birthday and the other was looking for a teapot for his daughter.  Suddenly, instead of thinking about this firing as an opportunity to work the bugs out my kiln, my focus shifted to not wanting to disappoint these two people. Not only were the pots being counted on for specific events, there were dates they needed to be finished by. Because I hate turning anybody down and I tend to respond well when I have a goal and deadlines, I went ahead and created a timeline of what I had to do by when in order to deliver the pots to folks on the agreed upon dates. The timeline was two months long.  That would be plenty of time.

After my son, Jackson, and I took apart the wood/gas kiln (see the two part blog, “Building a Kiln”), I immediately went to work building a more moderately sized and designed kiln fired solely with propane. It took about two weeks of working a little bit each day given it was late winter. Luckily, the kiln was considerably more straight forward and less complicated than the wood/gas combination.  With just under 30 cubic feet of interior space, it matched up with the capacity of the burners that I had and except for orienting the kiln diagonally to accommodate the chimney which I didn’t want to move, it fit the kiln room nicely and gave me plenty of safe space to walk around without having to do too many contortions.  I was on target with a month and a half of time left before reaching my deadline.

IMG_7746.JPG

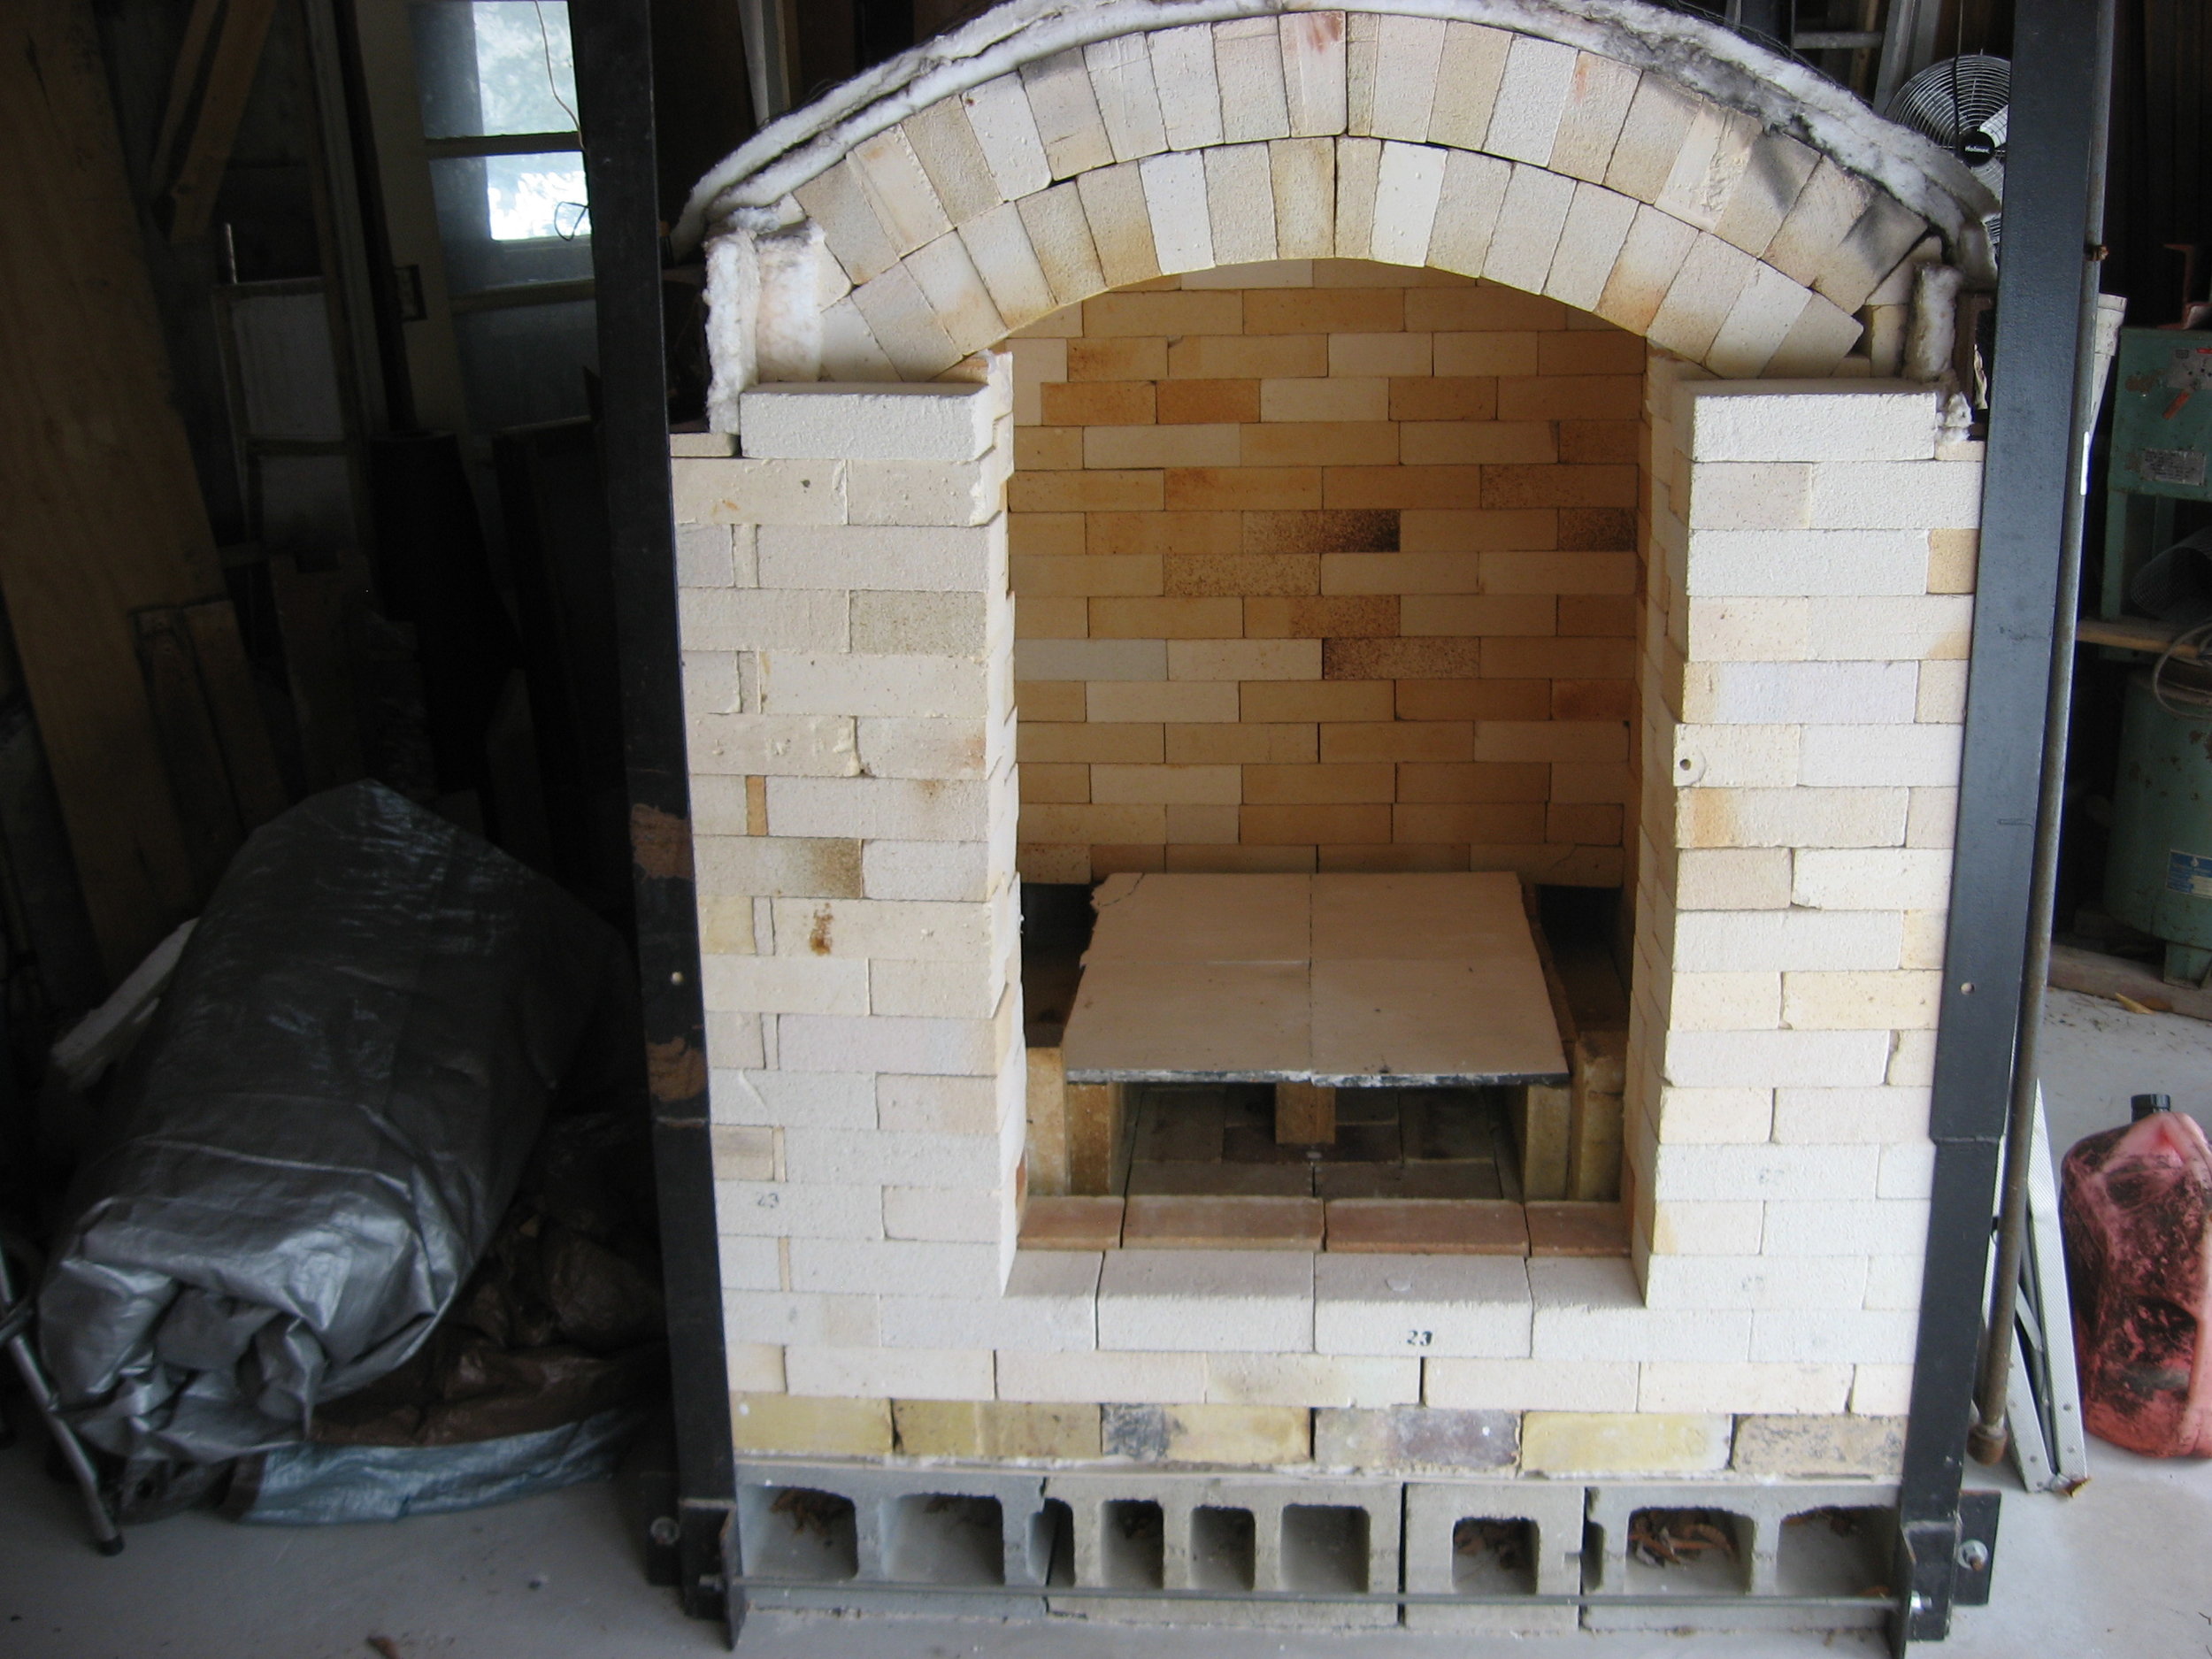
A week after finishing the new kiln, I fired it for the first time. Cooling a kiln typically takes almost as long as the firing so with a wait time of least eight hours ahead before opening the door, I was able to do some reflecting on the firing. The kiln was full of recent work- bowls, cups, mugs, jars, teapots and plates- and included the special order for my two friends.  The start of the kiln went well. Because it was newly constructed and likely holding some moisture given blowing snow that no doubt had found its way into the kiln room and the kiln, I started the two pilot burners slowly and had removed the top few rows of bricks in the door open to allow moisture to escape easily. The temperature outside was hovering around zero so that was likely close to the temperature in the kiln when I started. As the heat began to rise, I could see steam coming off the top of the sprung arch roof as well as from the opening in the door.  Two hours later, with the door bricked up except for two bricks in the top row, I turned on one of the two main burners and watched my pyrometer jump from 80 to about 350 (degrees Fahrenheit) in a few minutes. I had adjusted the forced air burner as low as possible and still the flame reached far into the kiln. I held my breath and listened for the familiar thud of pots cracking or worse, blowing up.  With no sounds of disaster, I stood back and watched as the temperature gauge climbed, degree by degree, up through 400 and then 500 degrees.  It was obvious from the start there was a difference in temperature from the top to the bottom of the kiln. I marked down the temperature changes every 30 minutes and waited for the first sign of the red glow inside the kiln that starts to appear around 1,000 degrees. When it did, it was very obvious that the bottom of the kiln was showing more red than the top. 

Trying to even out a firing is one of the biggest challenges firing a gas kiln, especially for the first time.  I started thinking about how far apart the top and bottom of the kiln would be by the time the firing concluded. The pyrometer is a very useful tool at the beginning, but once the kiln gets up to about 1,000, it’s time to start keeping an eye on the cones that are used to more accurately gauge the temperature of the kiln. The cones are made to melt at very specific temperatures that are linked to melting temperature of glazes used.  When the cones reach their melting temperature, they bend over and that provides very accurate indication of what’s happening inside the kiln. The higher the cone number, the higher the melting temperature with cones numbered 1-14 (approximately 2,000-2,500 degrees). For melting temperatures that are lower, the cone numbering system goes from 022-01 (approximately 1,000-1,900 degrees). If the cone number starts with a zero, the higher the number the lower the melting point. Confused yet? Typically, a bisque firing is done at cone 08-04 and the glazes I use melt at cone 10. I set up two sets of cones inside the kiln, one each in view of the top and bottom peepholes in the door.  My full attention would be on those two sets of cones as the firing proceeded.

IMG_8282.JPG

The first big event when doing a glaze firing is when the kiln reaches the point when a body reduction is done. Reduction refers to lessening or reducing the amount of oxygen available to combine with the fuel.  During reduction, because less oxygen is available in the form of air mixing with the fuel, oxygen is taken from the clay and glazes. In clay body reduction, the chemical make-up of the clay is altered and the clay darkens. With a clay body reduction scheduled for cone 08 and the pyrometer reading 1200 degrees, I had some time to try to balance the temperature of the top and bottom of the kiln. I recalled the words of a potter friend who shared, “cold bottom, damper out, cold top, damper in”, but also recalled other kilns that I had fired evened out over time and ended up very close by the time cone 10 melted.

I slid the damper in as I recalled my friend’s axiom thinking too much heat was escaping up the chimney and not pushing up to the top of the kiln.  In my downdraft kiln, the heat exits the kiln at the bottom of the kiln. With little change, I decided to fiddle with the gas/air mixture at the burners.  Not much change noted there either. With cone 08 bending in the bottom of the kiln, but not in the top, I decided to do the thirty minutes of body reduction despite the difference and then monitored the temperature as it climbed slowly but steadily over the next couple of hours. The top and bottom temperature continued to be uneven during this time and I watched helplessly as the kiln approached its maximum temperature knowing that something inside the kiln would have to be modified after the firing in order to solve the problem for the future.   After watching cone 10 bend over completely and then flatten out on the bottom and only a slight bend of cone 8 on the top, I made the decision to shut the kiln down. My thinking was it was best to accurately fire the pots located in the bottom half of the kiln and deal with the pots that would likely be underfired at the top and placed on the “seconds shelf”. From first lighting the pilot burner to shutting everything down took a little over eight hours, which was just about what I had hoped for. After closing the damper and pulling the burners back and blocking the ports, I shut the lights off in the studio knowing that I wouldn’t know the full results of the firing for at least 16 hours, maybe more. As I walked to the house from the studio, I thought about the kiln modification that would hopefully impact future firings and the reality that I wasn’t going to come through for the two folks who were counting on me for specific pots.

The next morning, with the kiln’s temperature still hovering at close to 900 degrees, I pulled one of the peepholes out to increase cooling and left it for a few more hours.  Pulling bricks out too fast can cause the kiln to cool too quickly with potential damage to pots. Both the clay and glaze have to cool slowly so they “fit” each other in order to avoid the risk of cracking. That said, pulling out the small peephole allowed a peak with a flashlight inside the kiln. The pots were coated with five different glazes- Leach White (as the name indicates, white), Shaner Oribe (green with some red breaking through), Turner Red (Red), Purple Haze (Blue/Purple) and TT Flambe (Red). As my eyes followed the flashlight beam into the kiln, even though it was a limited view, the only color I saw inside was something that I can only describe as tan. Checking my strong feelings of disappointment a bit because the rest of the kiln could provide more than I just witnessed, I had to wait it out for another few hours until the kiln got down to 500 degrees when I would be able to open the door more and get a better look.

IMG_8299.JPG

After the wait and with half of the door open, I now was able to see most of the top of the kiln, which led to unchecking my initial feelings of disappointment and instead let it become full blown. I knew the top would be underfired, but the glaze color range ran from light tan to, well, dark tan and something in between if there could possibly be a color called medium tan. In short, the results looked awful.  The cones told most, but not all of the story of the firing.  Cones are arranged in packs of at least four- a cone to start body reduction, a warning cone, target cone and guard cone. In this case the packs included cone 08, 9, 10 and 11 with one pack near the top of the kiln and the other near the bottom.  All of the cones in the bottom pack were bent over and fully melted. The cones in the pack on top looked pretty much as they did when I put them in the kiln. In addition to uneven temperature top to bottom, I also questioned whether there was sufficient reduction during the later stages of the firing as indicated by the tan results.

IMG_8301.JPG

The whole point of firing a gas kiln that can be reduced is to take advantage of the oxides in glazes and force them to give up some of the oxygen. When this happens in sufficient amount during sufficient amount of time, the chemical composition of the glaze changes and result is a variety of colors based on the oxide used. Because of the lack of color, I was pretty sure there hadn’t been enough reduction during the firing.  Typically some reduction should be taking place in the kiln from the time of the body reduction right up to end of the firing. Ensuring the right amount of reduction takes experience and multiple firings with a kiln, which will come later. The other big unknown for me was whether the glazes had been mixed correctly. Did I not calculate amounts correctly, screw up the percentages of oxides, not weigh materials correctly, neglect to add an ingredient or all of the above? What about the uneven temperature between the top and bottom of the kiln? How could that be corrected? It seemed that my job in the days ahead was to begin to identify variables that could have caused the poor results and find out which, if any, needed to be fixed. After that was accomplished, I needed to figure out what I was going to do with a kiln load of tan pots.

After the kiln cooled to about 500 degrees, I was able to open the door fully and do a more thorough look inside the kiln to check out the results. I pulled out a few of the pots near the back of the kiln and was very pleased to see there was some color mixed in among the khaki pots. Not a lot, but some. A few pots had some subtle streaks of red, a few others were green, underfired, but green, and a few had survived the firing and were blue.  After unloading the hundred or so pots from the kiln to a table in my studio, I was just shy of disappointed with the results. The pots that were chosen for gifts were more toward the “totally disappointed” side rather than “just shy of”. Luckily, I had another load of similar bisque pots that could be glazed, fired and ready for delivery, but now, with just a month left, there was even less room for error.

IMG_8302.JPG
 
Peter Evans